

Searching for how to make PVC wall panels usually has nothing to do with melting PVC powder in a garage. Un panou de perete din PVC autentic este produs prin extrudare printr-o matriță proiectată cu precizie, iar acest proces nu poate fi duplicat acasă sau la fața locului. Ceea ce puteți face, cu unelte obișnuite de tâmplărie, este să fabricați un perete finisat cu panouri din scândură sau scândură fabricată. That means controlled layout, clean cutting, and a fixing method that respects the natural movement of PVC.
This guide explains the sequence from a manufacturer’s perspective. It covers where PVC wall panels demand the highest attention, the surfaces that will make them fail, and how to get a tight, flat-looking finish on the first attempt.
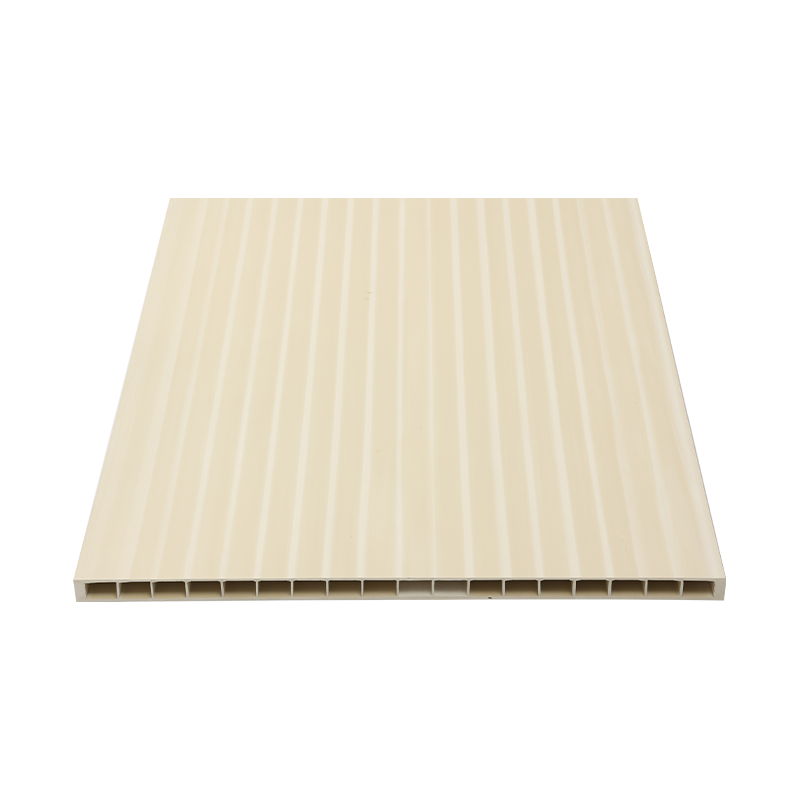
Alege materialul înainte de a măsura în detaliu. Panourile înguste de placare cu interblocare sunt realizate pentru pereți care sunt în mod rezonabil plani și pentru suprafețe verticale cu umiditate normală. Plăcile rigide plate funcționează mai bine atunci când doriți un aspect de perete fără sudură, pe toată înălțimea. In shower rooms, insist on a panel with sealed edges and a consistent thickness so the adhesive can key properly to the back face.
O cale practică este utilizarea unui produs fabricat din fabrică placă despărțitoare rigidă UPVC pentru un perete interior care necesită întreținere redusă. Se comportă previzibil la tăiere, nu absoarbe apa și poate fi fixat direct pe un substrat solid cu adeziv sau înșurubat pe șipci. Keep every joint tight, and remember that PVC expands more than wood when the room warms up.
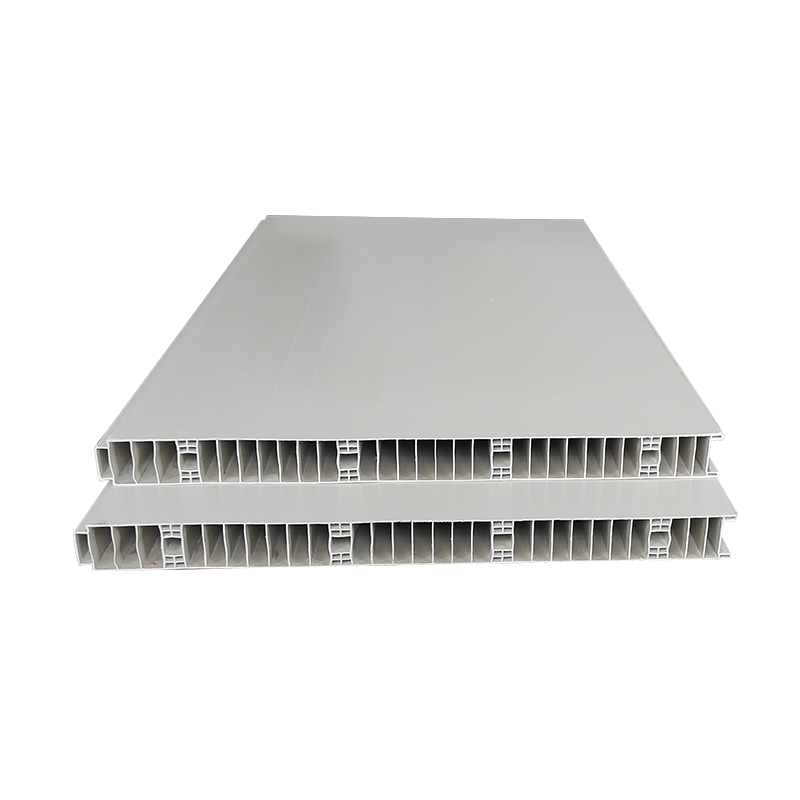 Custom OEM/ODM Waterproof UPVC Partition Board Producători, Companie Jiangyin Gwing Technology Co., Ltd is China Custom Waterproof UPVC Partition Board Manufacturers and OEM/ODM Company UPVC partition board... Vizualizare produs →
 The first panel determines how the entire wall looks. Start at a corner that will be seen first, and let the last narrow piece land in the least visible corner. If the first panel is not vertical, every following panel carries the same error.
Când mai multe panouri se întâlnesc de-a lungul unui perete lung, eșalonați rosturile cu cel puțin 300 mm. Acest lucru reduce șansa ca liniile verticale lungi să prindă lumină și face ca peretele să pară mai intenționat.
Un panou din PVC nu va aplatiza un perete. Pur și simplu urmărește forma a ceea ce se află în spatele ei. The most reliable result comes from a substrate that is clean, sound, and free of dust and grease.
Pentru pereții care sunt prost înclinați, șipcile de lemn înșurubate pe perete și nivelele distors sunt o alegere mai bună decât un strat gros de umplutură. Sipcile vă oferă, de asemenea, o locație garantată pentru șuruburi sau cleme, ceea ce contează în zonele umede unde umiditatea poate slăbi adezivul în timp.
Tăierea este locul unde se dezvăluie majoritatea instalărilor pentru prima dată. PVC does not splinter like ordinary wood if you use the correct blade and support the sheet while cutting. O lamă de ferăstrău cu dinți fini sau un ferăstrău cu o lamă cu finisaj curat este de obicei suficientă pentru panouri cu grosimea de până la 10 mm.
Marcați linia tăiată pe suprafața frontală cu un creion moale și o linie dreaptă. Tăiați din față, astfel încât orice rupere minoră de margine să rămână pe spate. For rectangular cut-outs such as sockets, drill a small starting hole in the waste area, insert the jigsaw blade, and cut along the marked lines. Slefuiți ușor marginea tăiată cu hârtie abrazivă fină pentru a îndepărta bavurile, apoi sigilați-o dacă marginea tăiată va fi expusă la umezeală.
Nu forțați tăierea umedă cu apă; PVC-ul are nevoie de o viteză constantă a lamei uscate. Fast feeding creates heat, which can melt the edge and make the panel look rough.
Five small blobs of adhesive may hold a panel for a week, but they leave air behind the sheet and allow flexing over time. O instalare corectă necesită un contact continuu peste tot, în special în jurul perimetrului.
Apply a high-strength construction adhesive in serpentine lines along the back of each panel, with extra beads close to all edges. Press the panel onto the wall and work a clean, straight-edged block across the face to push out trapped air. Wipe away any adhesive that squeezes out before it hardens, because cured adhesive is difficult to remove from the smooth surface.
Pe un cadru de șipcă, metoda se schimbă ușor. Fixați panoul de-a lungul canelurii sau flanșei la fiecare îmbinare, păstrând distanța dintre șuruburi la 300 mm până la 400 mm. Nu strângeți niciodată excesiv șuruburile din PVC; the goal is to hold the panel firmly, not to pull the material into a curve.
Position the first panel against the corner datum and leave a small gap for expansion. Check the face with a spirit level at the top, middle, and bottom before moving on. Interlocking panels should be pushed edge to edge rather than hammered into place with a metal tool; utilizați un bloc cu fața moale dacă articulația este rigidă.
As each new board goes in, listen for the click of the tongue entering the groove. Treceți cu degetul mare în jos pe cusătură după montare; it should feel flat. If one edge sits high, the problem is usually dust or adhesive in the groove, so clean the joint before pressing again. To make a complete, waterproof surface in a shower area, seal the seams with a neutral-cure silicone after the adhesive has set and the panels are stable.
Nothing makes a PVC panel wall look more unfinished than a raw cut edge in a visible corner. Use an internal corner strip or an external edge trim to cover the cut ends, and apply silicone along internal corners so dirt cannot collect there.
At the bottom of the wall, the expansion gap should be closed with a skirting profile. Instead of a wooden skirt that may absorb water, a moisture-resistant WPC skirting board is a stable option for finishing the gap and protecting the lower edge. Cut it with the same fine-tooth saw method, fit it on top of the panel rather than behind it, and seal the top line with a thin bead of silicone.
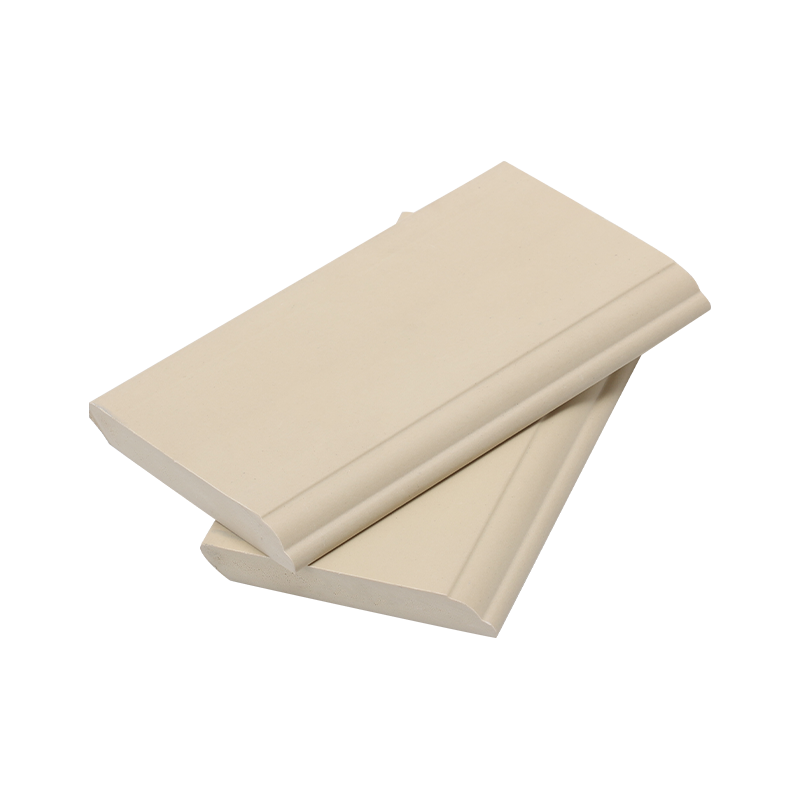 Custom Waterproof WPC Skirting Board Manufacturers, Company As China Custom Waterproof WPC Skirting Board Manufacturers, Company, JiangYin Gwing Technology Co. Ltd Offer OEM/ODM Waterproof WPC Skir... Vizualizare produs →
 Majoritatea pereților din panouri PVC eșuați sunt cauzate de un substrat neuniform, lipsa permiselor de expansiune sau etanșarea slabă a marginilor. The following table summarises the situations that tend to appear during installation.
| Problem | Usual cause | What to do |
|---|---|---|
| Panoul arată ondulat pe un perete plat de ipsos | Adezivul a fost aplicat în locuri izolate în loc de un pat plin | Remove the panel, clean both surfaces, and spread adhesive across the full back face before refitting. |
| O îmbinare se deschide la câteva săptămâni după instalare | Nu este permisă dilatarea termică | Leave a 2 mm to 3 mm gap at all stops and cover the gap with trim rather than forcing panels tight. |
| Adezivul nu se ține pe peretele din baie | Placile glazurate sau substratul prăfuit împiedică lipirea | Utilizați un cadru din șipcă sau un grund compatibil conceput pentru suprafețe ceramice netede. |
| Pe marginea inferioară apar pete de apă | Marginea tăiată nu a fost sigilată înainte de montare | Seal cut edges with neutral-cure silicone and keep the floor-area expansion gap protected by a skirting profile. |
Realizarea unui panou de perete din PVC în sens practic nu înseamnă turnarea plasticului într-o baie. Este vorba despre selectarea unei plăci fabricate, tăierea ei curată și fixarea acesteia pe o suprafață care să o susțină ani de zile. If you follow the sequence of material choice, layout, substrate preparation, cutting, fixing, and trimming, the wall will look flat and professional.
În calitate de producător, am văzut proiecte eșuate mai rar din cauza calității materialelor decât din cauza comenzilor rapide de instalare. Use a supplier who can state the waterproofing and surface characteristics clearly, keep every cut-out clean, and seal every edge that may become wet.

 limbă
limbă


